Datasource and Mapping
uDCV can connect and fetch data from external database using JDBC, to setup database connection, configure field mapping and schedule data fetch job.
DataSource Management
To access Datasource Management module, click Data Source button on the left-hand navigation bar in the Management Console
Create New Datasource
- Click +Add data source button on the upper right corner in Data Source management UI
- Input data source information, as shown below:
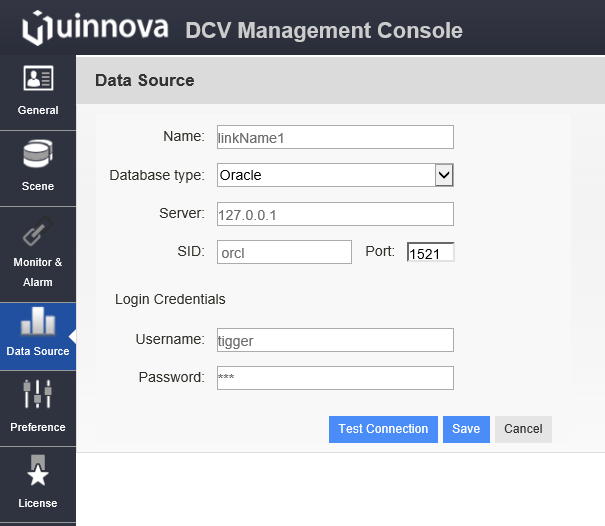
- Click Test Connection button to test database connection.
- Click Save to save new data source.
Edit Existing Datasource
- Select user to be edit from datasource list under Data Source management UI, and click edit icon on the right hand side.
- Modify datasource information, as shown below:
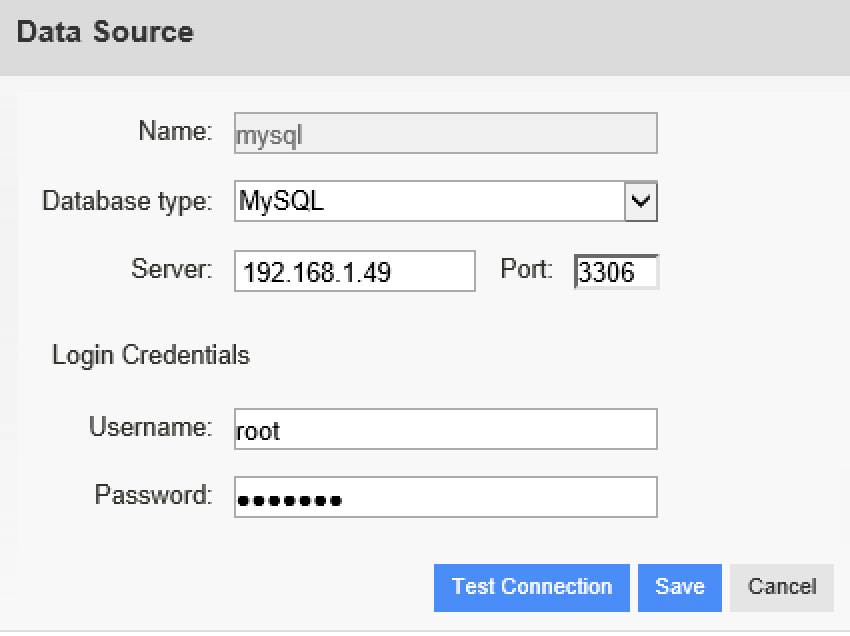
- Click Save button to save change.
Delete Datasource
- Select datasource to be deleted from datasource list under Data Source management UI, and click delete icon on the right hand side.
- Click OK to confirm delete. Click Cancel to cancel operation.
Dataset Management
Click Dataset tag in Data Source management UI to access dataset management functions.
Create New Dataset
- Click +Add dataset button on the upper right corner.
- Input data set information, as shown below:
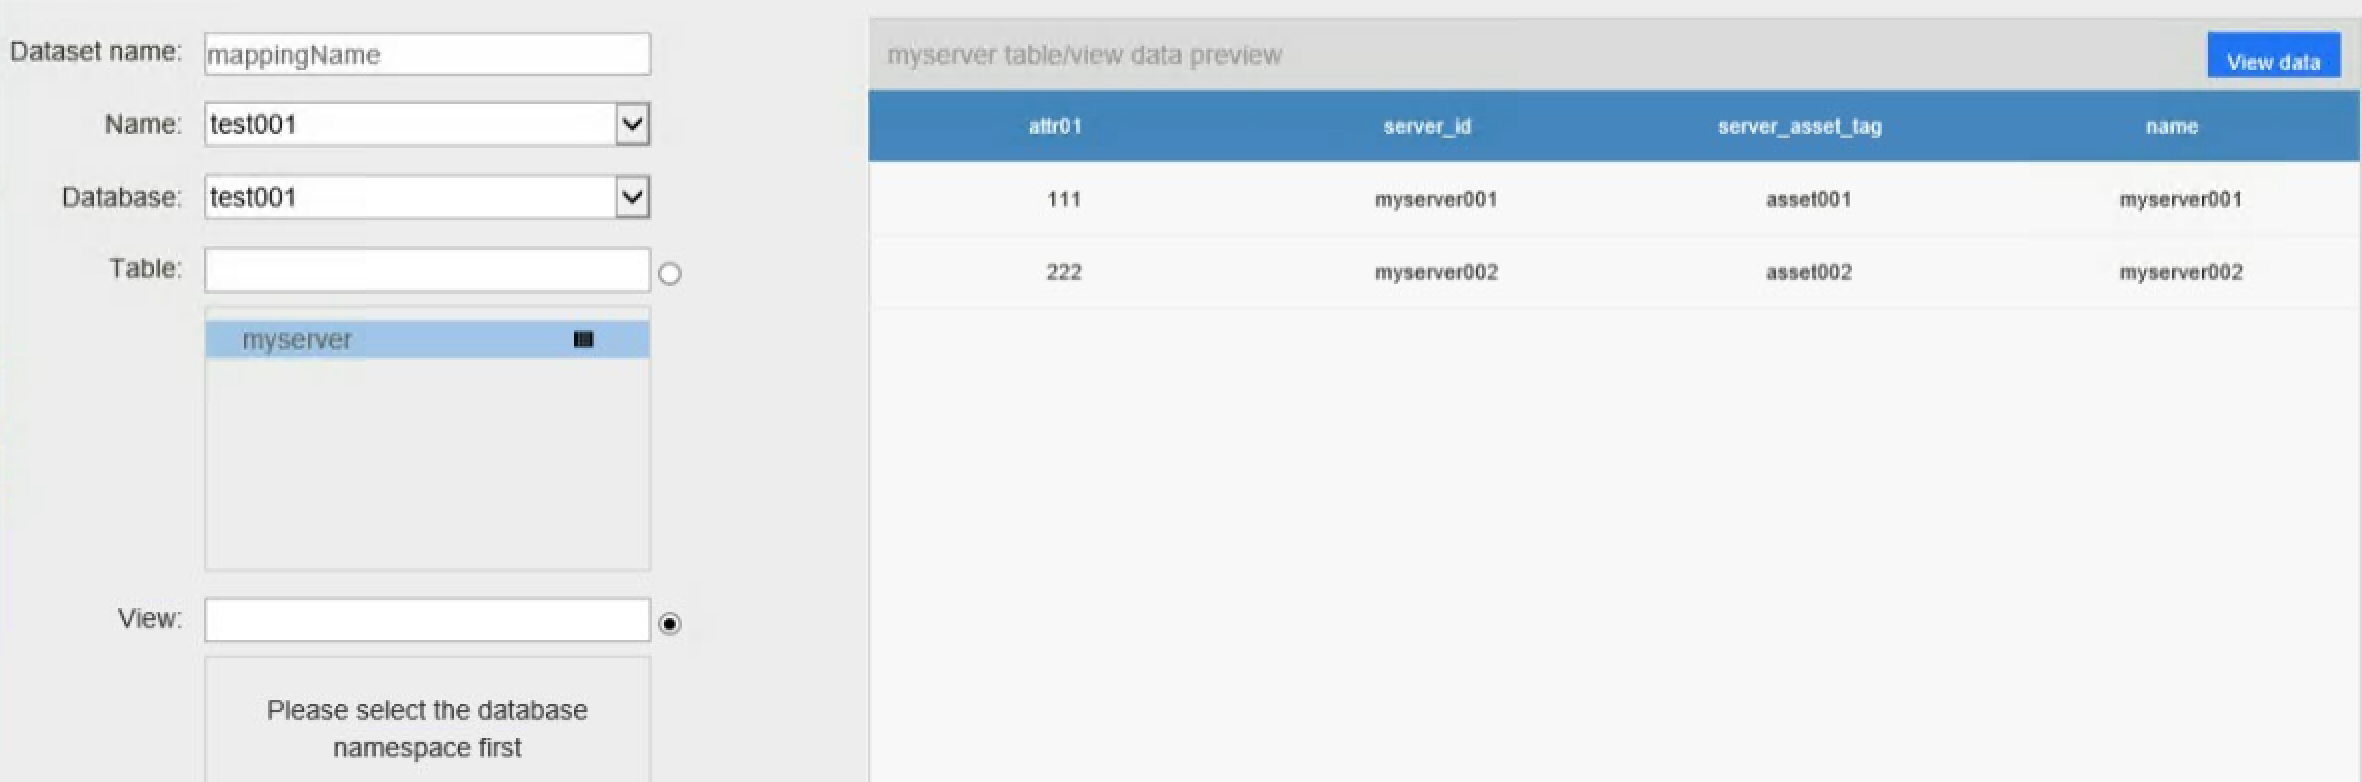
- Click Preview button to preview data from dataset.
Note
First 20 records are shown in preview mode.
- Click Save to save new dataset.
Edit Existing Dataset
- Click +Edit dataset button on the right hand side.
- Input data set information.
- Click Preview button to preview data from dataset.
Note
First 20 records are shown in preview mode.
- Click Save to save change.
Delete Dataset
- Select dataset to be deleted from dataset list, and click delete icon on the right hand side.
- Click OK to confirm delete. Click Cancel to cancel operation.
Data Mapping
Click Data Mapping tag in Data Source management UI to access data mapping functions.
Create New Data Mapping
- Click +Add Category Mapping button on the upper right corner.
- Input mapping ans scheduler information, as shown below:
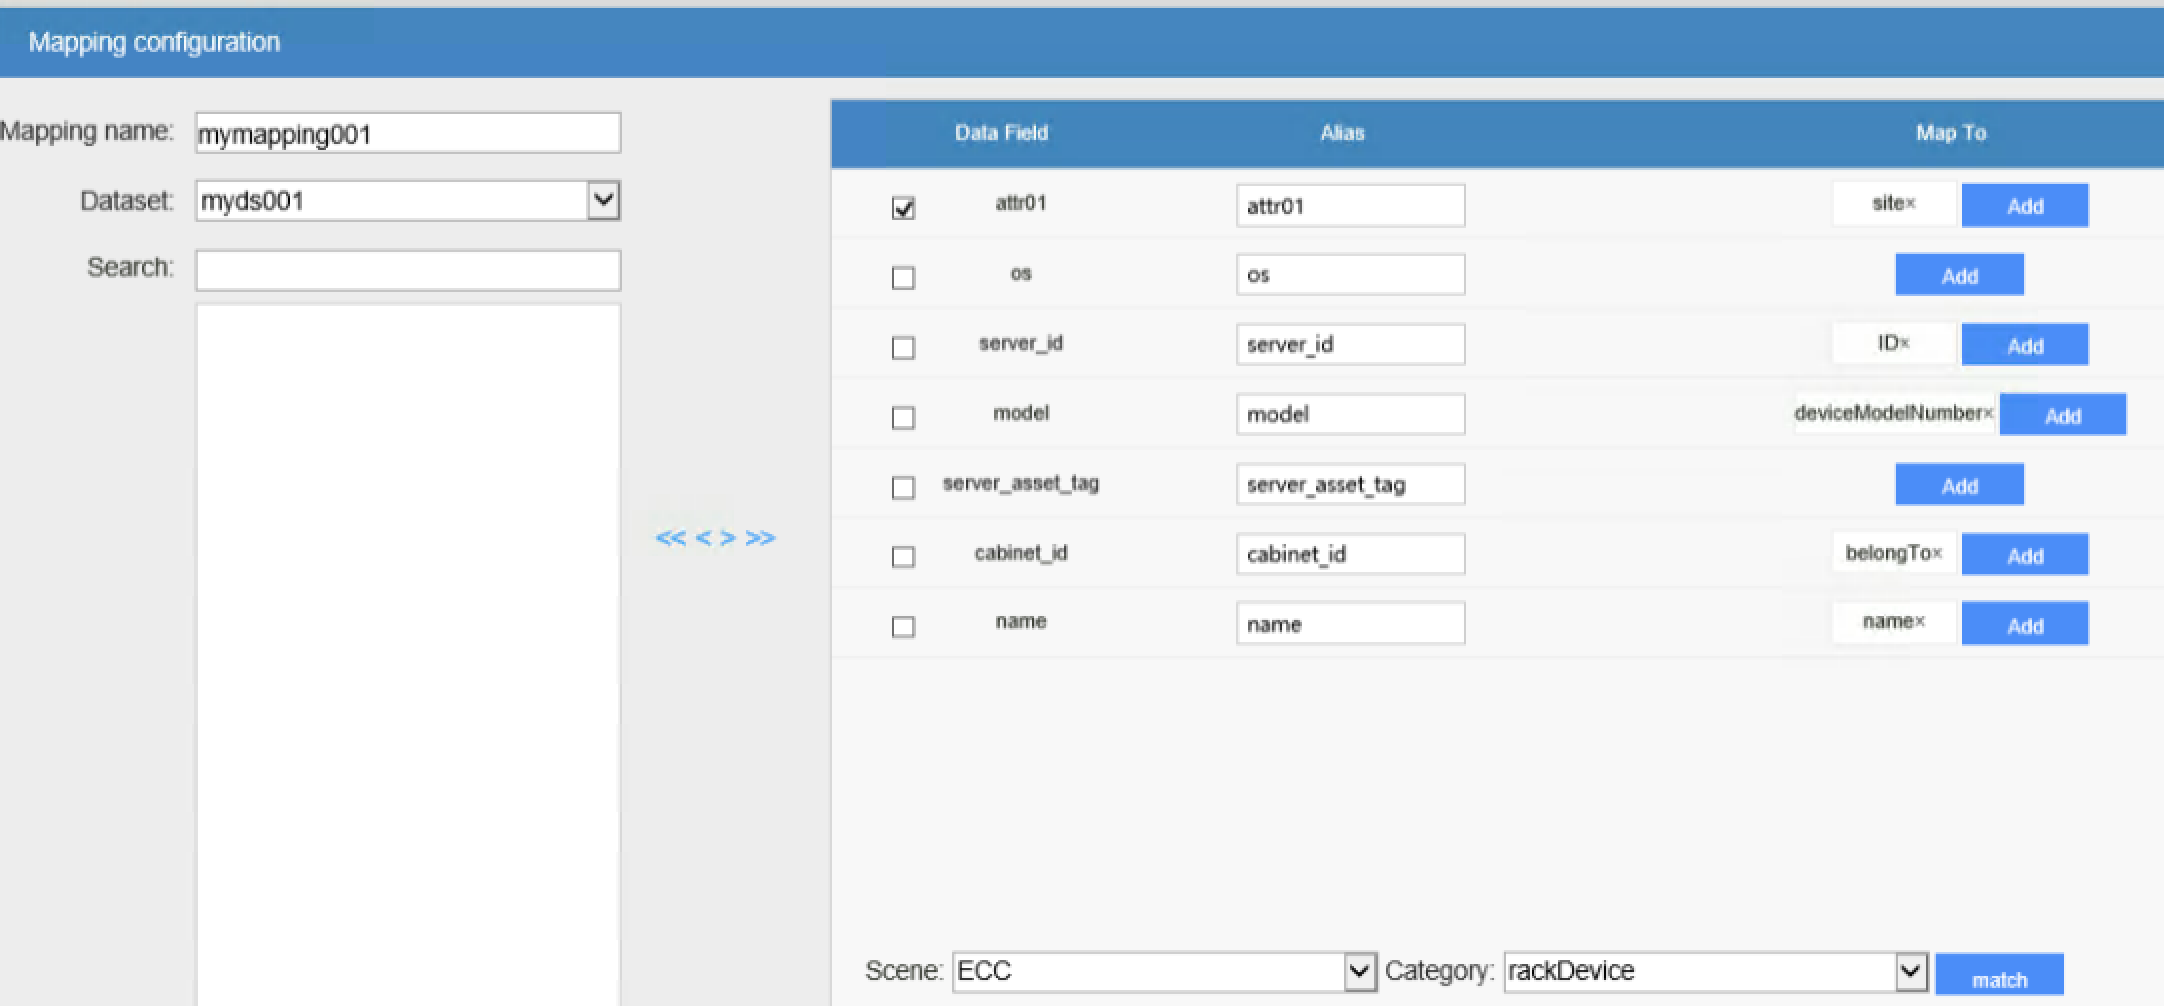
- Click Save to save new data mapping.
Note
There are 6 required field which must exist and mapped from dataset, namely:
- ID
- Name
- Belong to
- Site
- Layout
- deviceModelNumber
Edit Existing Data Mapping
- Click +Edit dataset button on the right hand side.
- Input mapping information.
- Click Save to save change.
Delete Data Mapping
- Select data mapping to be deleted from data mapping list, and click delete icon on the right hand side.
- Click OK to confirm delete. Click Cancel to cancel operation.
Run Data Mapping Job
Data mapping can be run manually or by scheduler.
Run Once
Click Execute once only to run data import once.
Run by Scheduler
Click Start execution to run data import job by scheduler.
Stop Scheduler
Click Stop execution button under data mapping definition to stop data import scheduler for that particular data mapping.